Rooting a S20FE with Magisk
Rooting is the process of gaining elevated privileges on a comparatively restricted device, such as a phone. In this walkthrough, we will run through the process of rooting a phone (S20FE 5G, r8q) running LineageOS 23 (Android 16). We will be installing Magisk by sideloading it here.
Please ensure you have an unlocked bootloader before continuing!
I claim no responsibility for any data loss or bricking that occurs from following this walkthrough. This guide is for the S20FE running LineageOS, although it may work for other devices and software variants, it is not tested and you continue at your own risk. There is no universal magisk rooting guide.
Rebooting into sideload using adb
Firstly, ensure that USB Debugging is enabled on your device. I am using an S20FE running LineageOS 23. Then, connect your device to your computer with a data USB cable. Unlock your phone, and you should get a prompt asking you to allow USB Debugging: 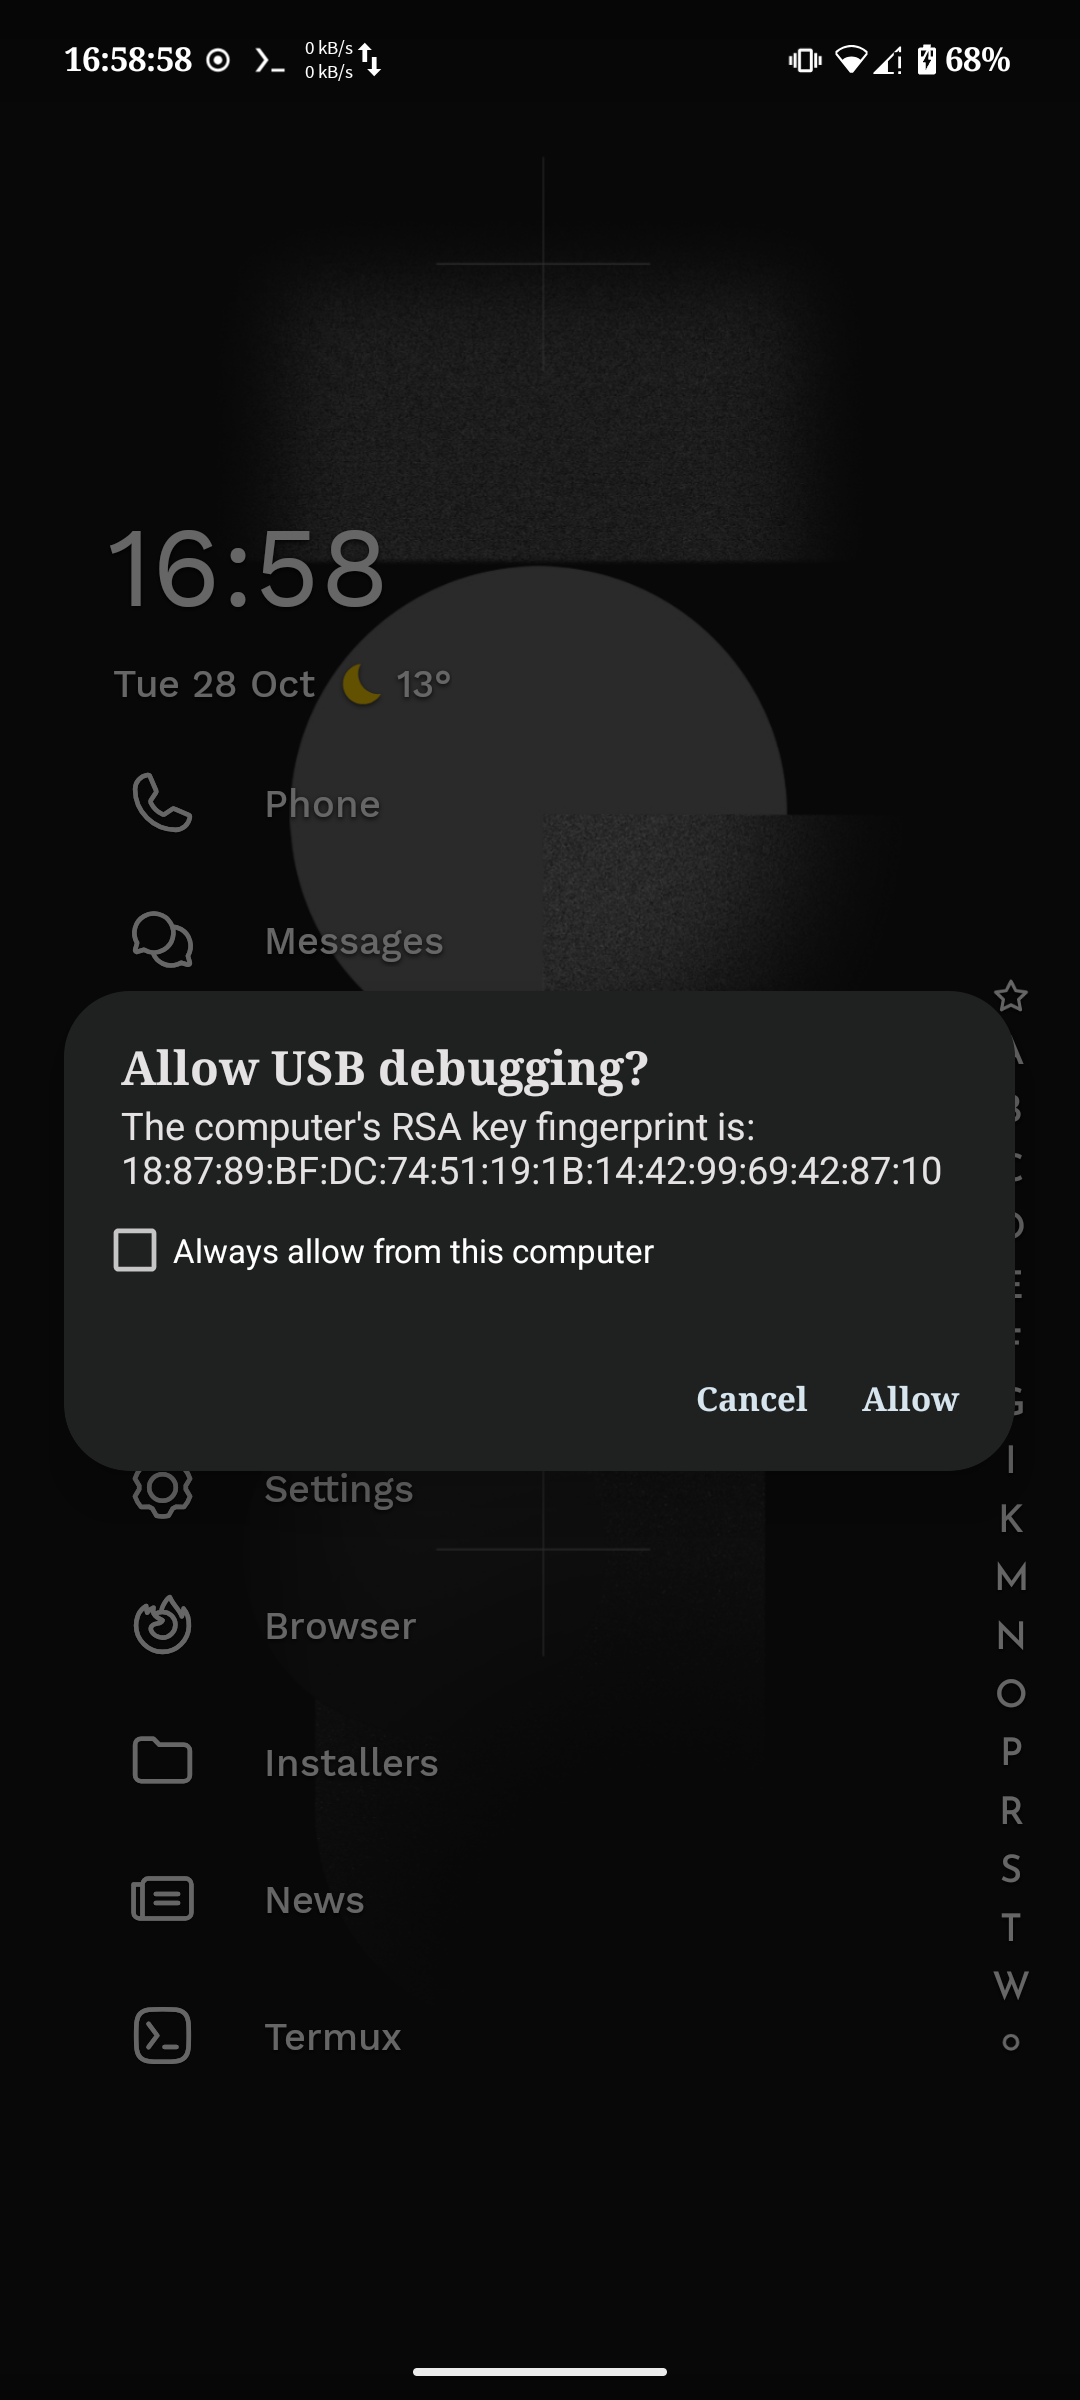
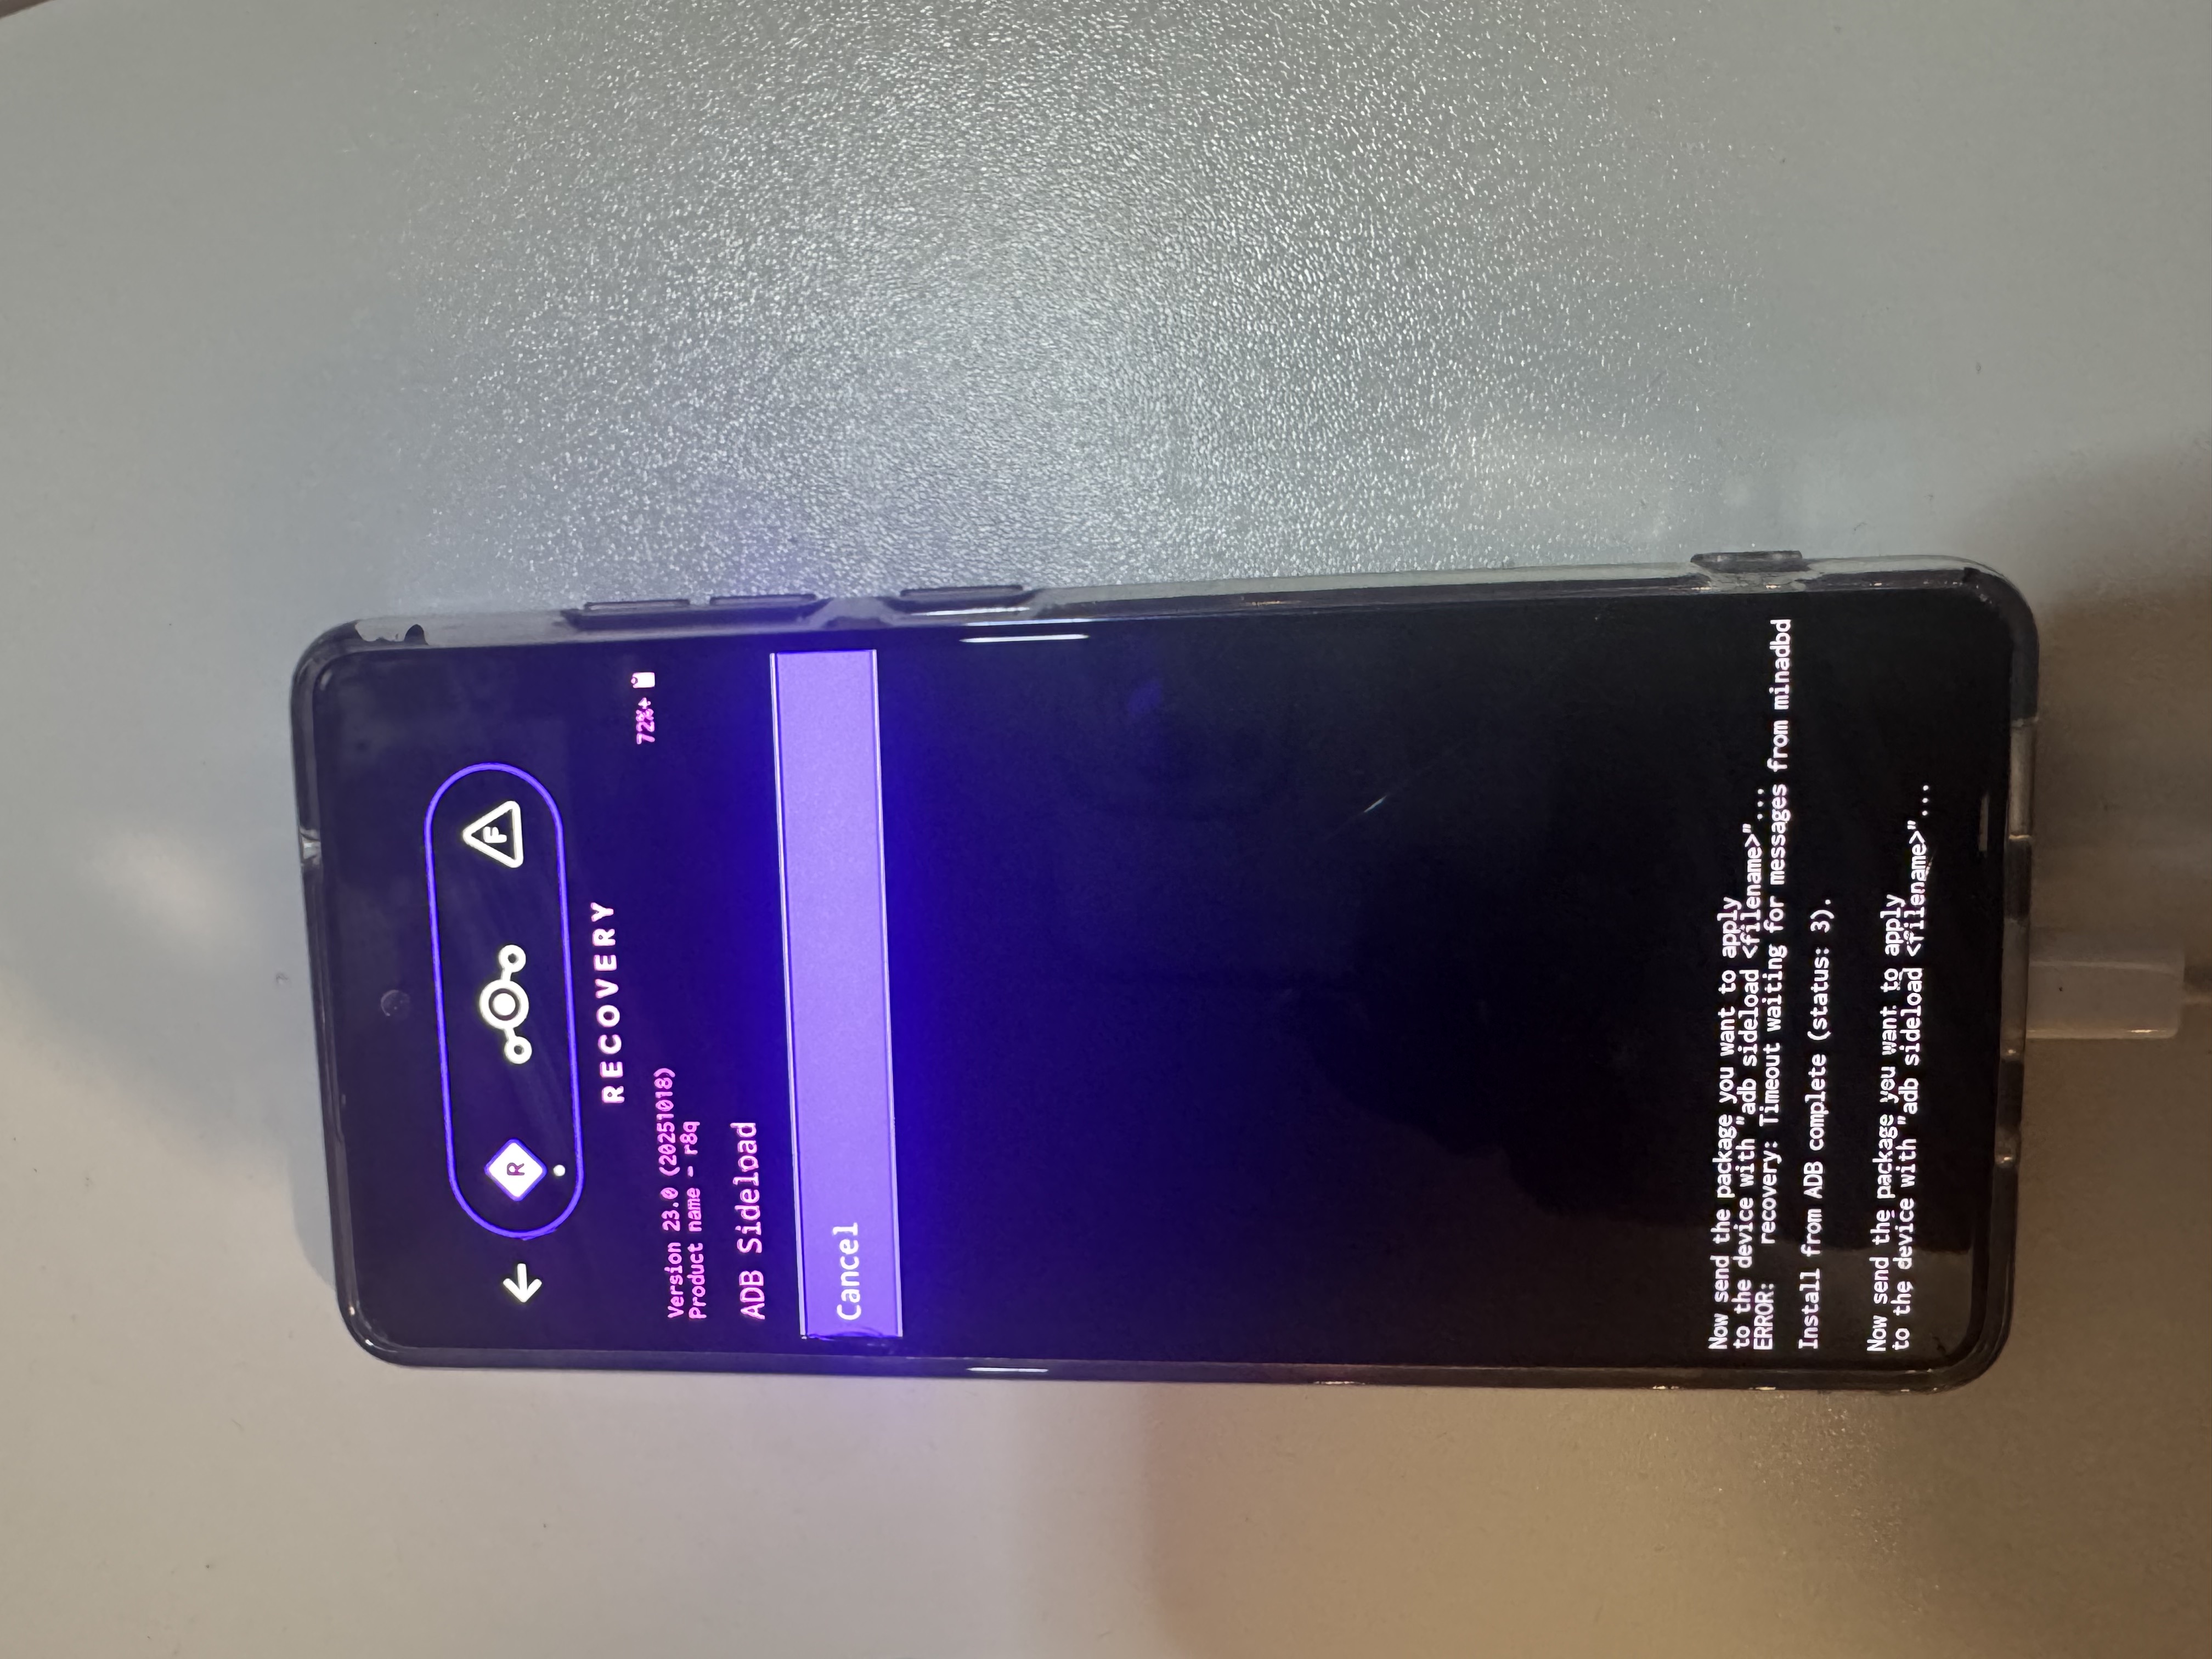
After allowing this, we can then navigate to our terminal and reboot our device into recovery mode:
1
adb reboot sideload
Downloading the magisk .apk
After this, we will now be in Lineage’s recovery mode where we can install the Magisk .zip. Navigate to the official Magisk Repo and download an APK file for flashing 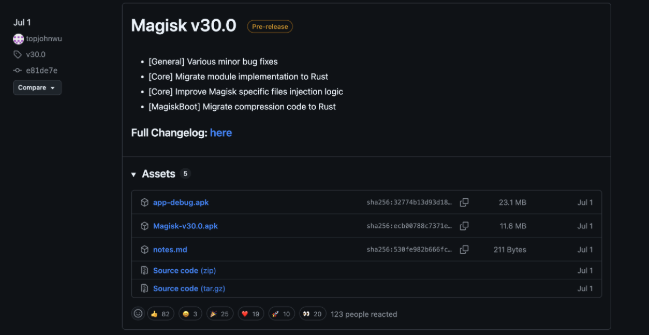 (I used
 v30.0)
Flashing the magisk .apk to our device
Now, we can begin flashing. Before flashing, double-check that the device is in sideload mode:
1
adb devices
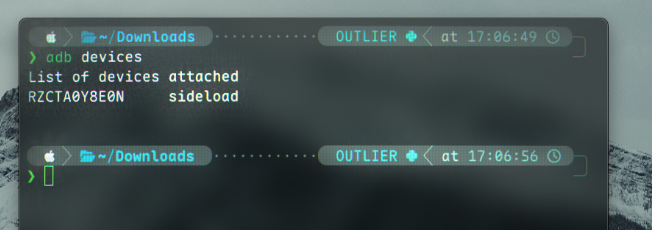
Now, we can patch the .apk to our device:
1
adb -d sideload Magisk-v30.0.apk
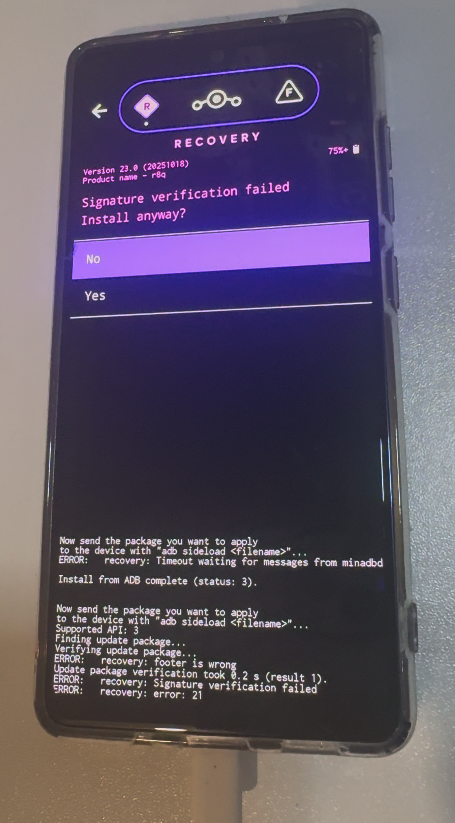
We may get a notice with something such as Signature Verification Failed. This is expected, and we can just continue.
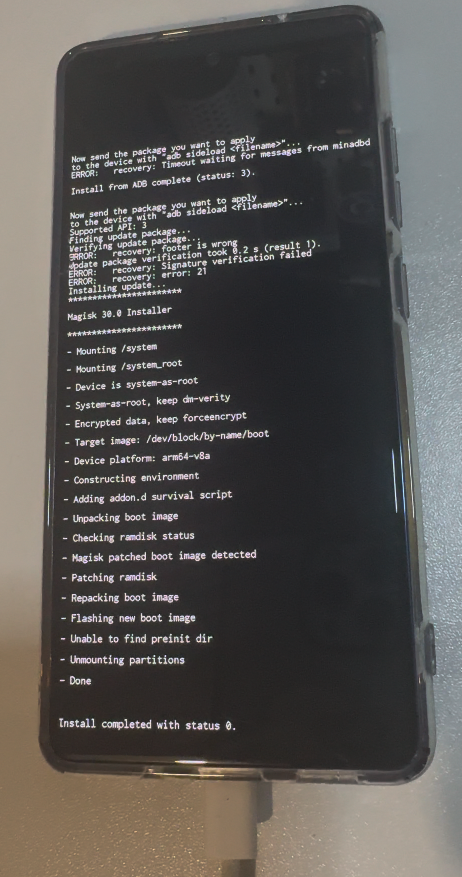
After a successful installation, we can boot into our phone as normal and we should successfully be rooted 🎉 
Check the newly-installed “Magisk” app to ensure root was successfully installed.